|
| Monsters are out in Badtime |
Title: Monsters are out in Badtime
Artwork Treatment:
i) Description: The artwork is to focus on the things that the society never realized within our culture. The idea that the child at home is safer than being outside, but we never realized the monsters that's lurking within the four walls of our home; especially the ones we never thought what it seems to be. The teddy bear represents one of the most unexpected elements that might cause a major harm towards the child. A teddy bear is known as a child's comfort item as they will held on to their favourite soft toy whenever they felt afraid. The artwork shows the contradiction where the child's "comfort and saviour" turned it's claws to the child instead of protecting them from the harm within the house hold. The teddy bear represents as one of the relatives that the child is close too. This type of abuse had happened within our society but turned a blind eye as the child was too afraid to speak up for help.
ii) Art movement: Lowbrow Art
iii) Artist reference: Junko Mizuno.
iv) Theme: Society and Culture
 |
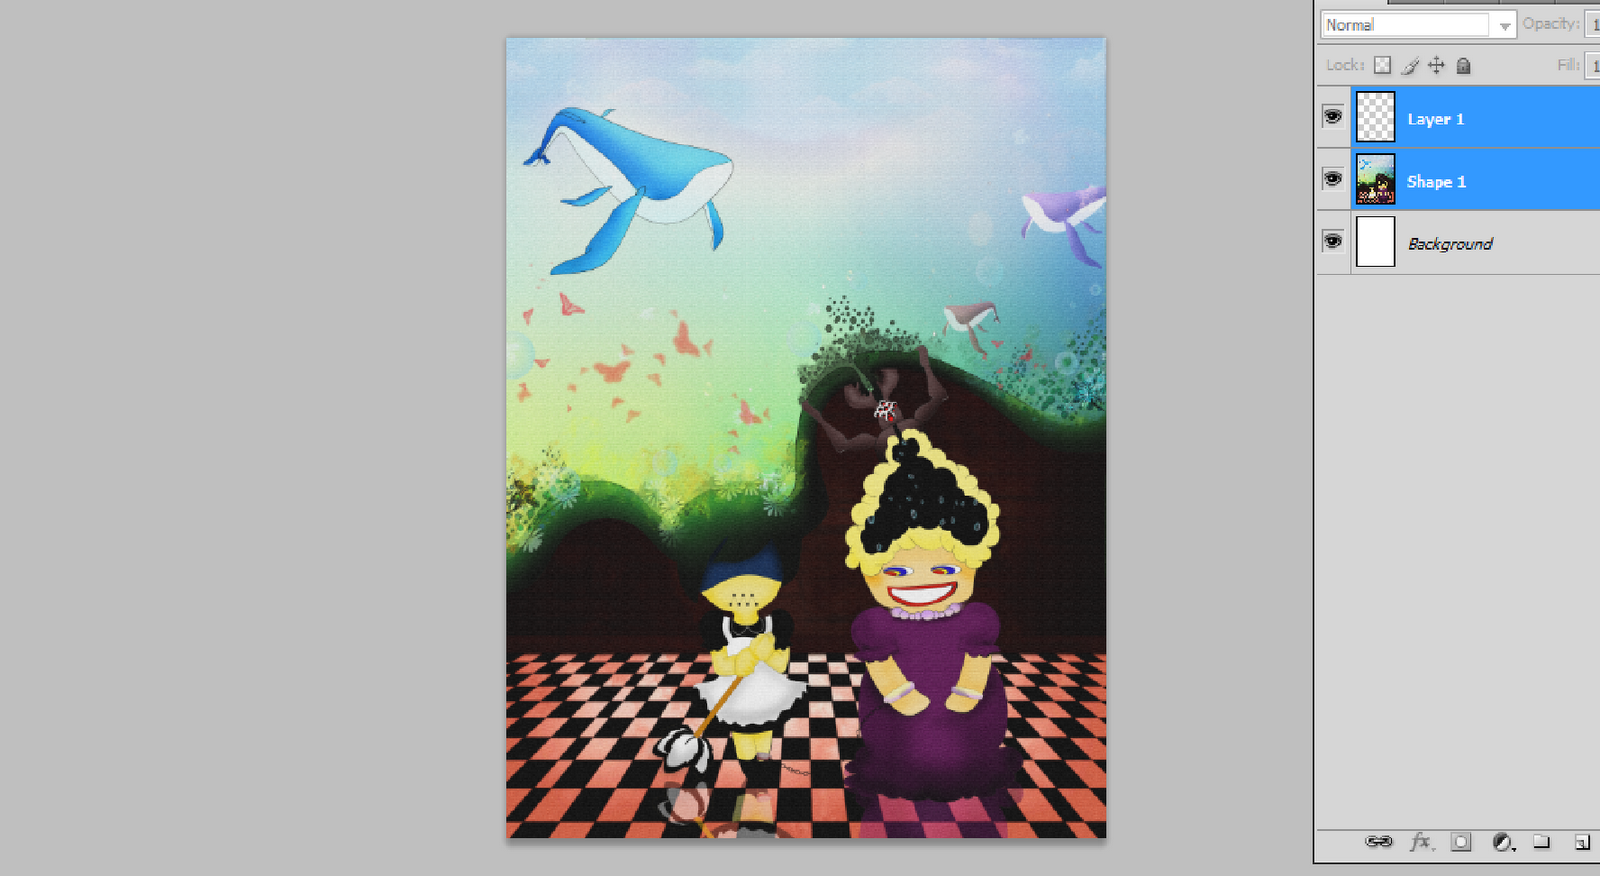
| Whales and aTick |
Artwork Treatment:
i) Description: The artwork depicts how the creative mind is being manipulated and oppressed by those who are in the higher ups, especially overpowering others by wealth and status. The mind of the "maid" - the one who is being manipulated and oppressed (symbolized by the chain) by the "purple lady". The checkered floor symbolizes the game of life which all of us have to went through- who will be sacrificed, who will over power the other. The "other world" that the "maid" had in her mind is a combination of peaceful, creative and better life that all of us had in mind. The whale represents - creativity, peace and love. Crimson Butterflies represents society that lives in harmony and the colours in the "other world" represents something that contradicts the life that uses the concept of the stronger overpowers the weaker ones.
ii) Art Movement: Lowbrow Art
iii) Artist Reference: Yusuke Ueno
iv) Theme: Society and Culture.
 |
| Bubbly Butterflies |
Title: Bubbly Butterfly
Artwork Treatment:
i) Description: The whole picture is self explanatory. It is regarding to the society's concept of body image which many strive for in order to feel belonged in the society which worships beauty.
ii) Art Movement: Lowbrow Art
iii) Artist Reference: Junko Mizuno
iv) Theme: Society and Culture